MycilaShutterSpeedTester
ESP32 firmware to measure camera shutter speeds

![]()
![]()
![]()
Description
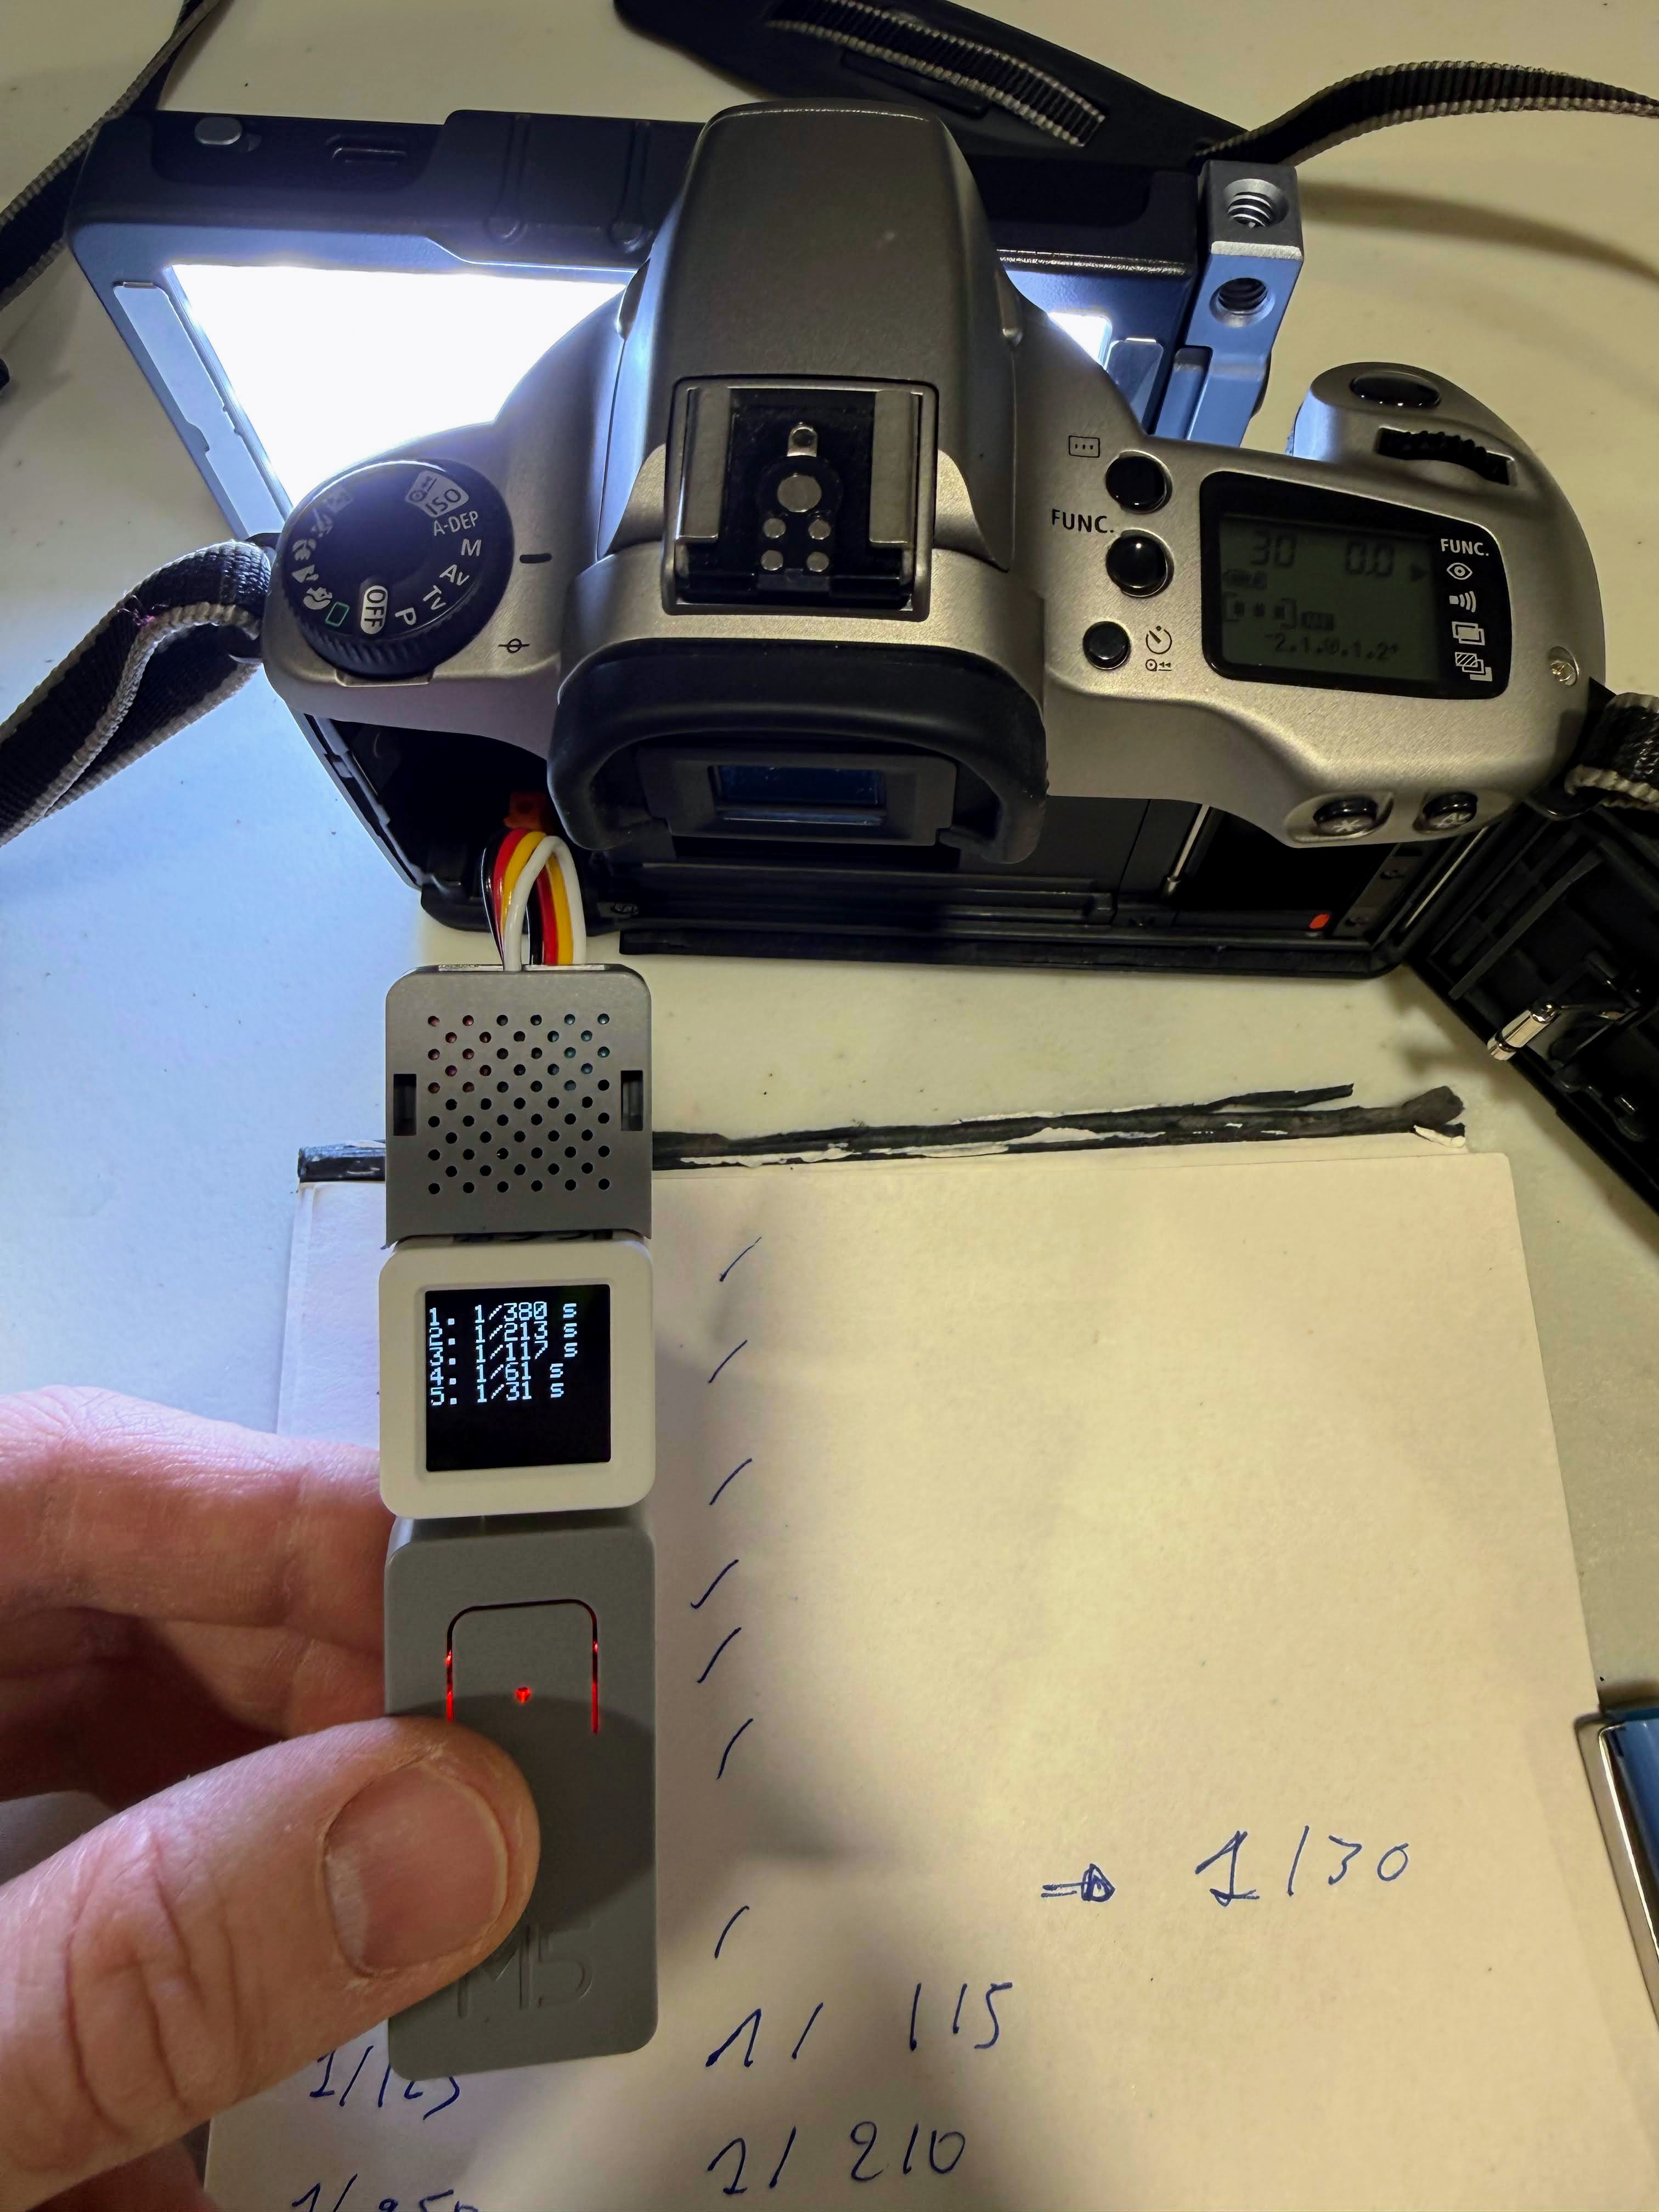
This is an ESP32-based device designed to accurately measure camera shutter speeds. It uses a light sensor to detect when the shutter opens and closes, calculating the exact duration with microsecond precision. The device displays the last 8 measurements on its screen and outputs detailed readings via serial console.
The device supports two shutter types with optimized detection thresholds:
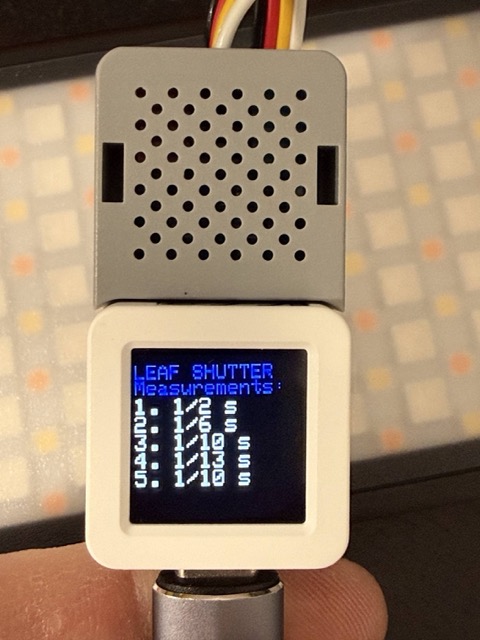
- Leaf shutters (e.g., Rollei 35S)
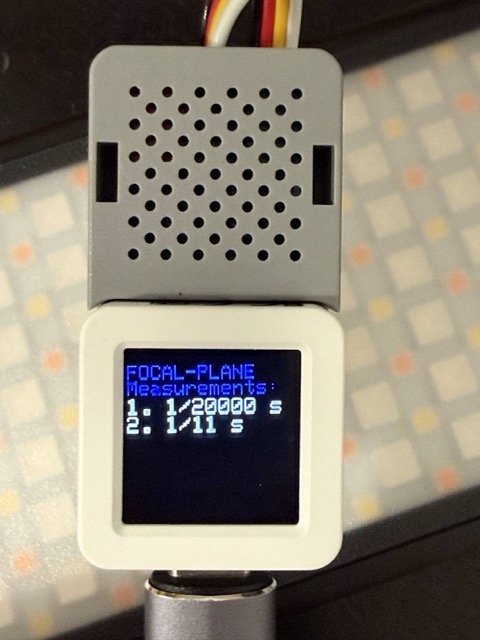
- Focal-plane shutters (e.g., Canon EOS 3000)
Switch between modes by double-clicking the button.
Perfect for:
- Testing and verifying mechanical shutter speeds
- Checking shutter accuracy on vintage cameras
- Diagnosing shutter timing issues
- Calibrating camera shutters
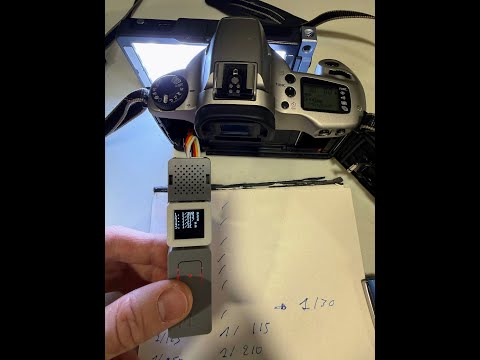
YouTube video to demonstrate the device in action:
Hardware Requirements
To build this project, you will need the following M5Stack components:
| Component | Price | Link | Required |
|---|---|---|---|
| ATOMS3 Dev Kit | ~$15 | M5Stack Store | ✅ Yes |
| Light Sensor Unit (Photo-resistance) | ~$3 | M5Stack Store | ✅ Yes |
| ATOMIC PortABC Extension Base | ~$3 | M5Stack Store | ✅ Yes |
| ATOM TailBat (Battery Accessory) | ~$9 | M5Stack Store | ⚪ Optional |
Total cost: ~$21 (without battery) or ~$30 (with battery)
Note: The ATOM TailBat battery is optional but recommended for portable use.
Installation
Releases (firmware binaries) are available on the GitHub releases page.
Prerequisites
You need esptool.py installed on your system. Install it using pip:
pip install esptool
Flashing the Firmware
- Connect your ATOMS3 to your computer via USB
- Erase the flash memory:
esptool.py erase_flash - Flash the firmware:
esptool.py write_flash 0x0 MycilaShutterSpeedTester-BOARD.bin
Wiring
The wiring is straightforward using the M5Stack ecosystem:
-
Connect the ATOMS3 to the PortABC Extension Base
- Simply plug the ATOMS3 onto the PortABC base
-
Connect the Light Sensor to Port B
- Plug the Light Sensor Unit into Port B of the PortABC Extension Base
- The light sensor will be connected to GPIO8
-
Optional: Connect the TailBat
- Attach the ATOM TailBat to the bottom of the setup for portable operation
- This allows you to use the device without USB power
Connection Diagram:
[ATOMS3 Dev]
     ↓
[PortABC Extension Base]
     ↓ Port B
[Light Sensor Unit]
     ↓ (optional)
[ATOM TailBat Battery]
Important: Make sure the light sensor is connected to Port B (GPIO8) for the firmware to work correctly.
Usage
Setup
- Position the light sensor directly in front of your camera lens
- Ensure the sensor is close enough to detect light changes when the shutter opens
- The device should be powered on and displaying the main screen
- Select the appropriate shutter mode:
- Leaf shutter mode for cameras with leaf shutters
- Focal-plane mode for cameras with focal-plane shutters
- Double-click button A to switch between modes
Taking Measurements
- Point the light sensor at a light source (or camera lens pointed at light)
- Fire the camera shutter
- The device will automatically:
- Detect when the shutter opens (light increases)
- Detect when the shutter closes (light decreases)
- Calculate the time difference
- Display the measurement on screen and serial console
Display Information
- The top line shows the current shutter mode (
LeaforFocal-plane) - The screen shows up to 7 most recent measurements
- Measurements are displayed in standard shutter speed notation:
- Fast speeds:
1/250 s,1/500 s,1/1000 s, etc. - Slow speeds:
1.0 s,2.5 s, etc.
- Fast speeds:
Button Controls
- Single-click button A:
- In measurement mode: Clear all measurements and reset the display
- In calibration mode: Reset threshold to default value
- Double-click button A: Cycle through modes:
- Leaf shutter measurement
- Focal-plane shutter measurement
- Leaf shutter calibration
- Focal-plane shutter calibration
- Hold button A: In calibration mode, increment the detection threshold
 |
 |
 |
 |
Calibration Modes
The device includes calibration modes for both shutter types to fine-tune the light detection threshold. Different cameras and lighting conditions may require different sensitivity levels.
When to calibrate:
- The device fails to detect shutter openings/closings
- You get inconsistent or erratic readings
- You’re using different lighting conditions than the default calibration
How to calibrate:
-
Enter calibration mode:
- Double-click button A to cycle to either “LEAF SHUTTER Calibration” or “FOCAL-PLANE Calibration” mode
- The screen will show the current threshold value and real-time light sensor readings
-
Adjust the threshold:
- Point the light sensor at your light source (same setup as for measurements)
- Observe the raw sensor value displayed on screen
- Hold button A to increment the threshold (cycles from 0 to 4075 in steps of 25)
- The sensor reading will be colored:
- Yellow: Sensor value is above threshold (light detected)
- Red: Sensor value is below threshold (no light detected)
-
Find the optimal threshold:
- With the shutter open (sensor pointing at light), the reading should be yellow (above threshold)
- Trigger the shutter and observe if readings drop to red when closed
- Adjust the threshold so it reliably distinguishes between open and closed states
- The threshold is automatically saved to device memory
-
Reset to defaults:
- Single-click button A in calibration mode to restore factory defaults
Default calibration notes:
- Calibrated using a Boling BL-P1 light at 8500K at 100% with diffuser, positioned close to the camera lens or lens mount
- Leaf shutter: tested with Rollei 35S
- Focal-plane shutter: tested with Canon EOS 3000
Tips for Accurate Measurements
- Ensure good lighting conditions or point the camera at a bright light source. I tested with a Boling BL-P1 light at 8500K at 100% with diffuser close to camera lens or lens mount.
- Position the sensor as close as possible to the lens
- For very fast shutter speeds (>1/1000s), ensure the light source is very bright
- The device filters out measurements shorter than 1.5ms to avoid false readings
Development Tips
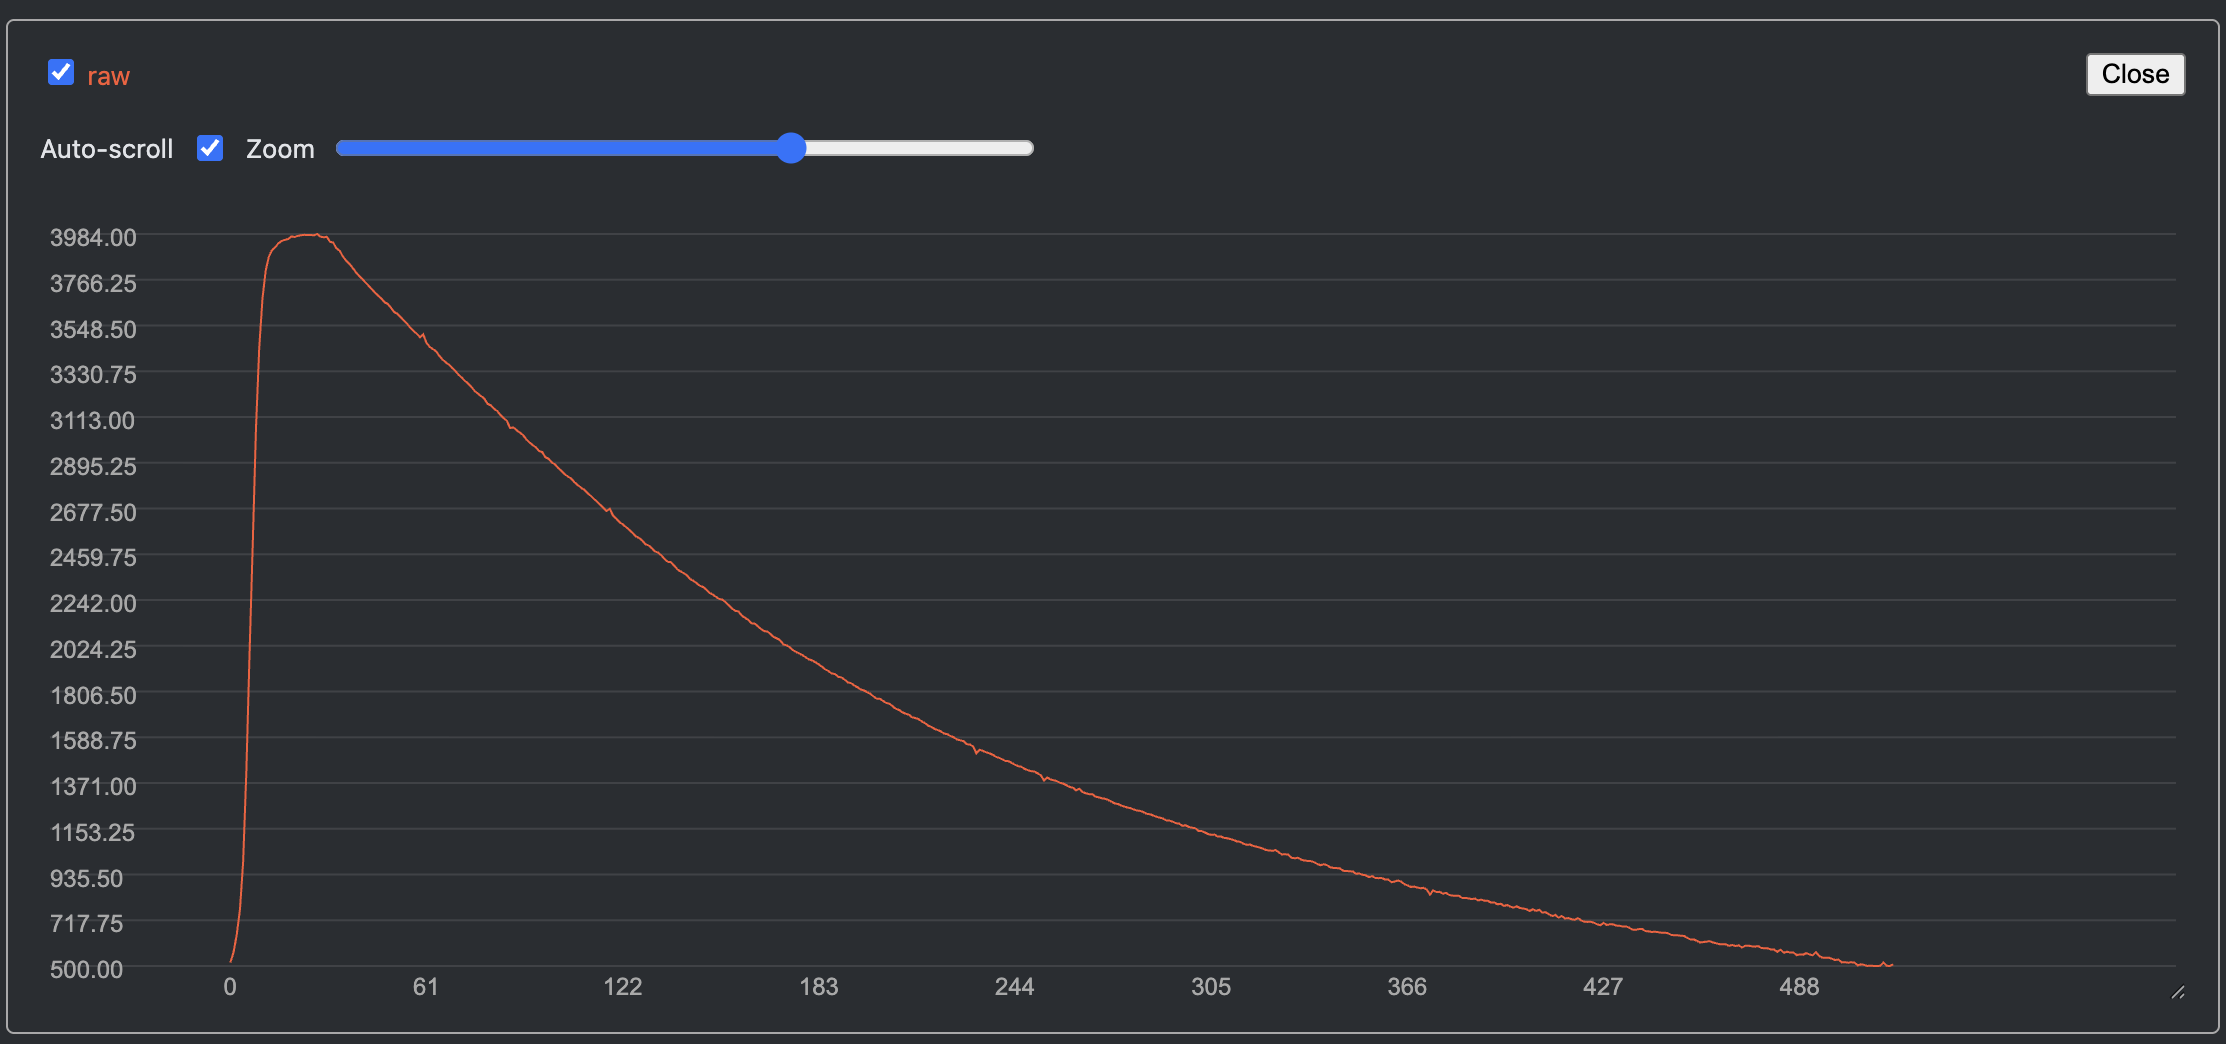
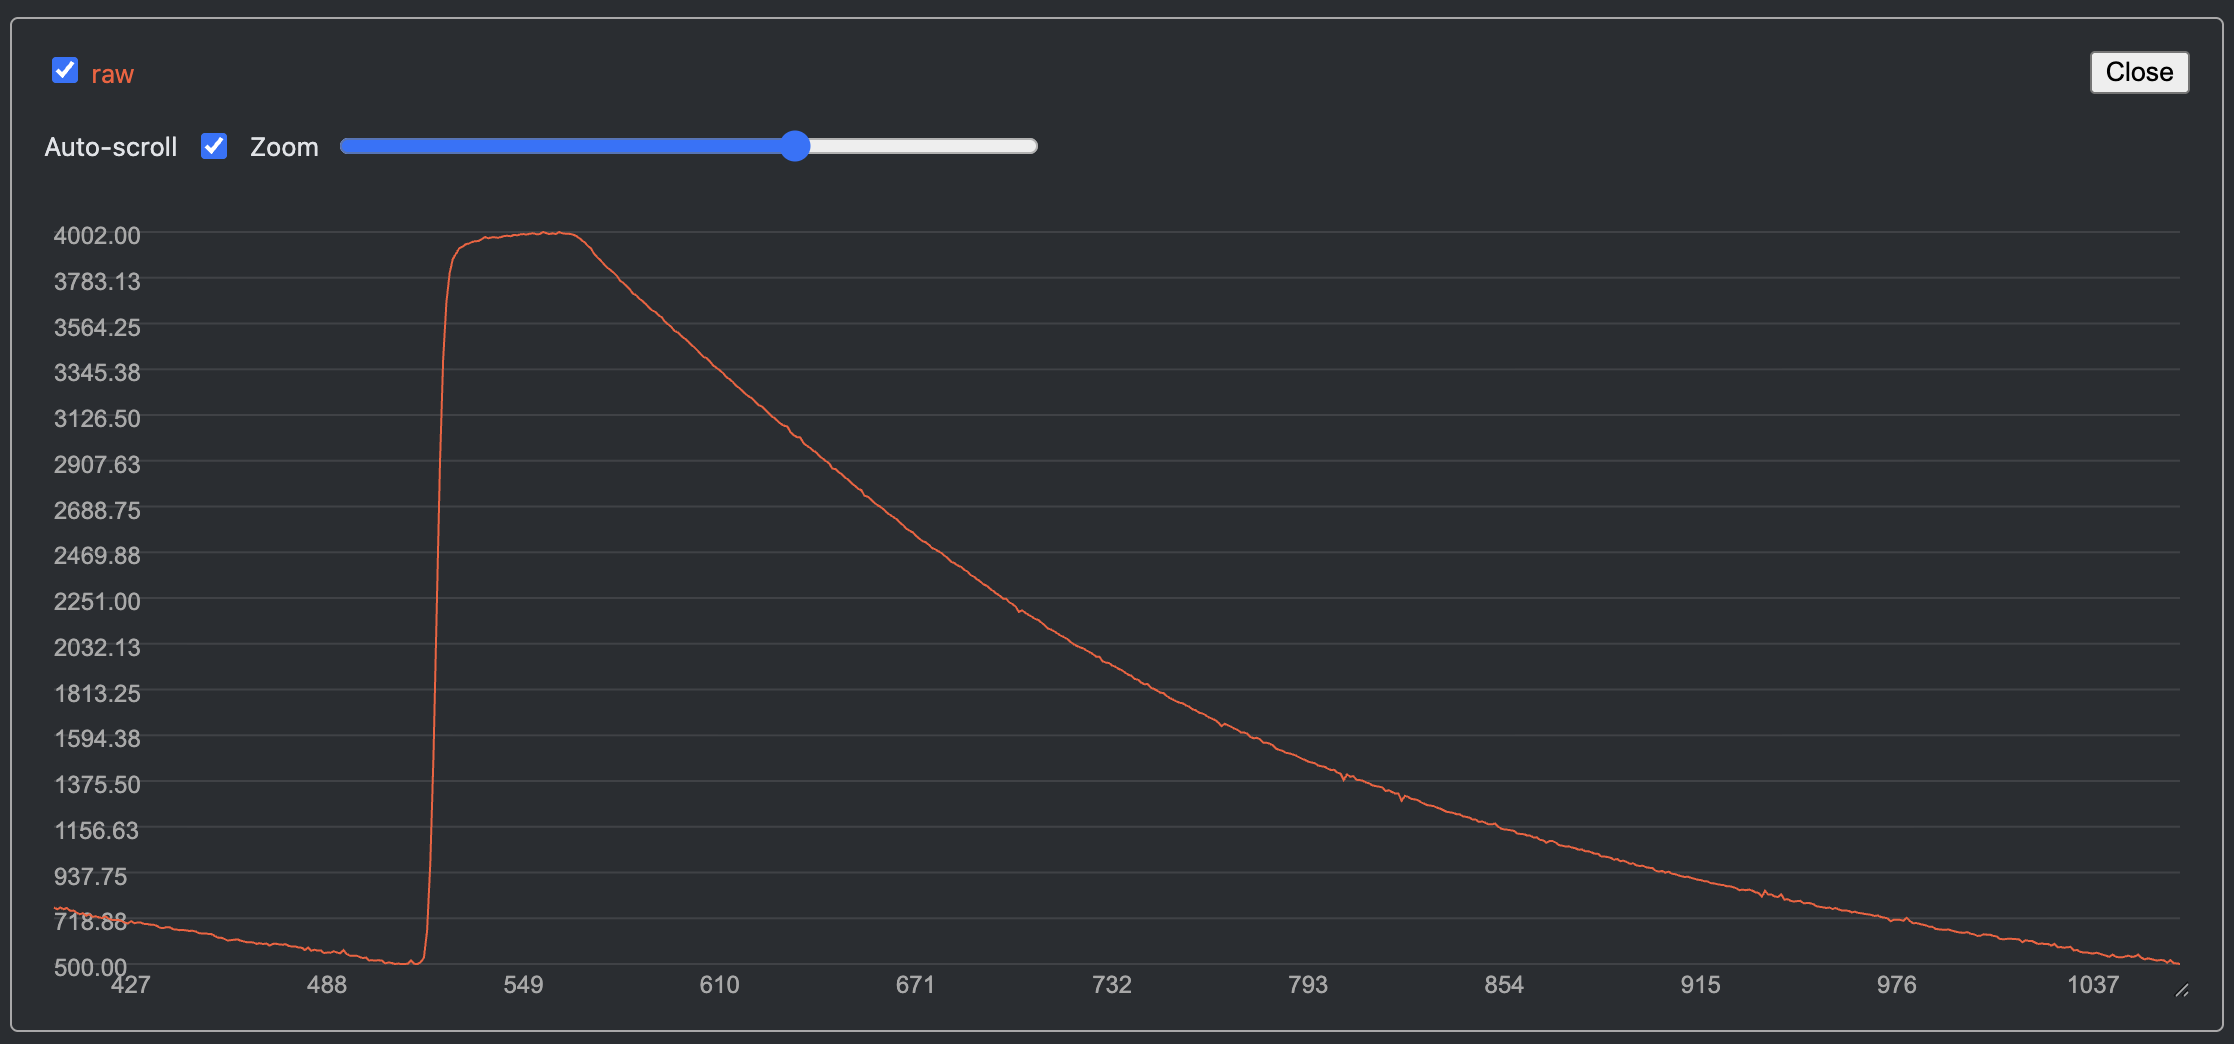
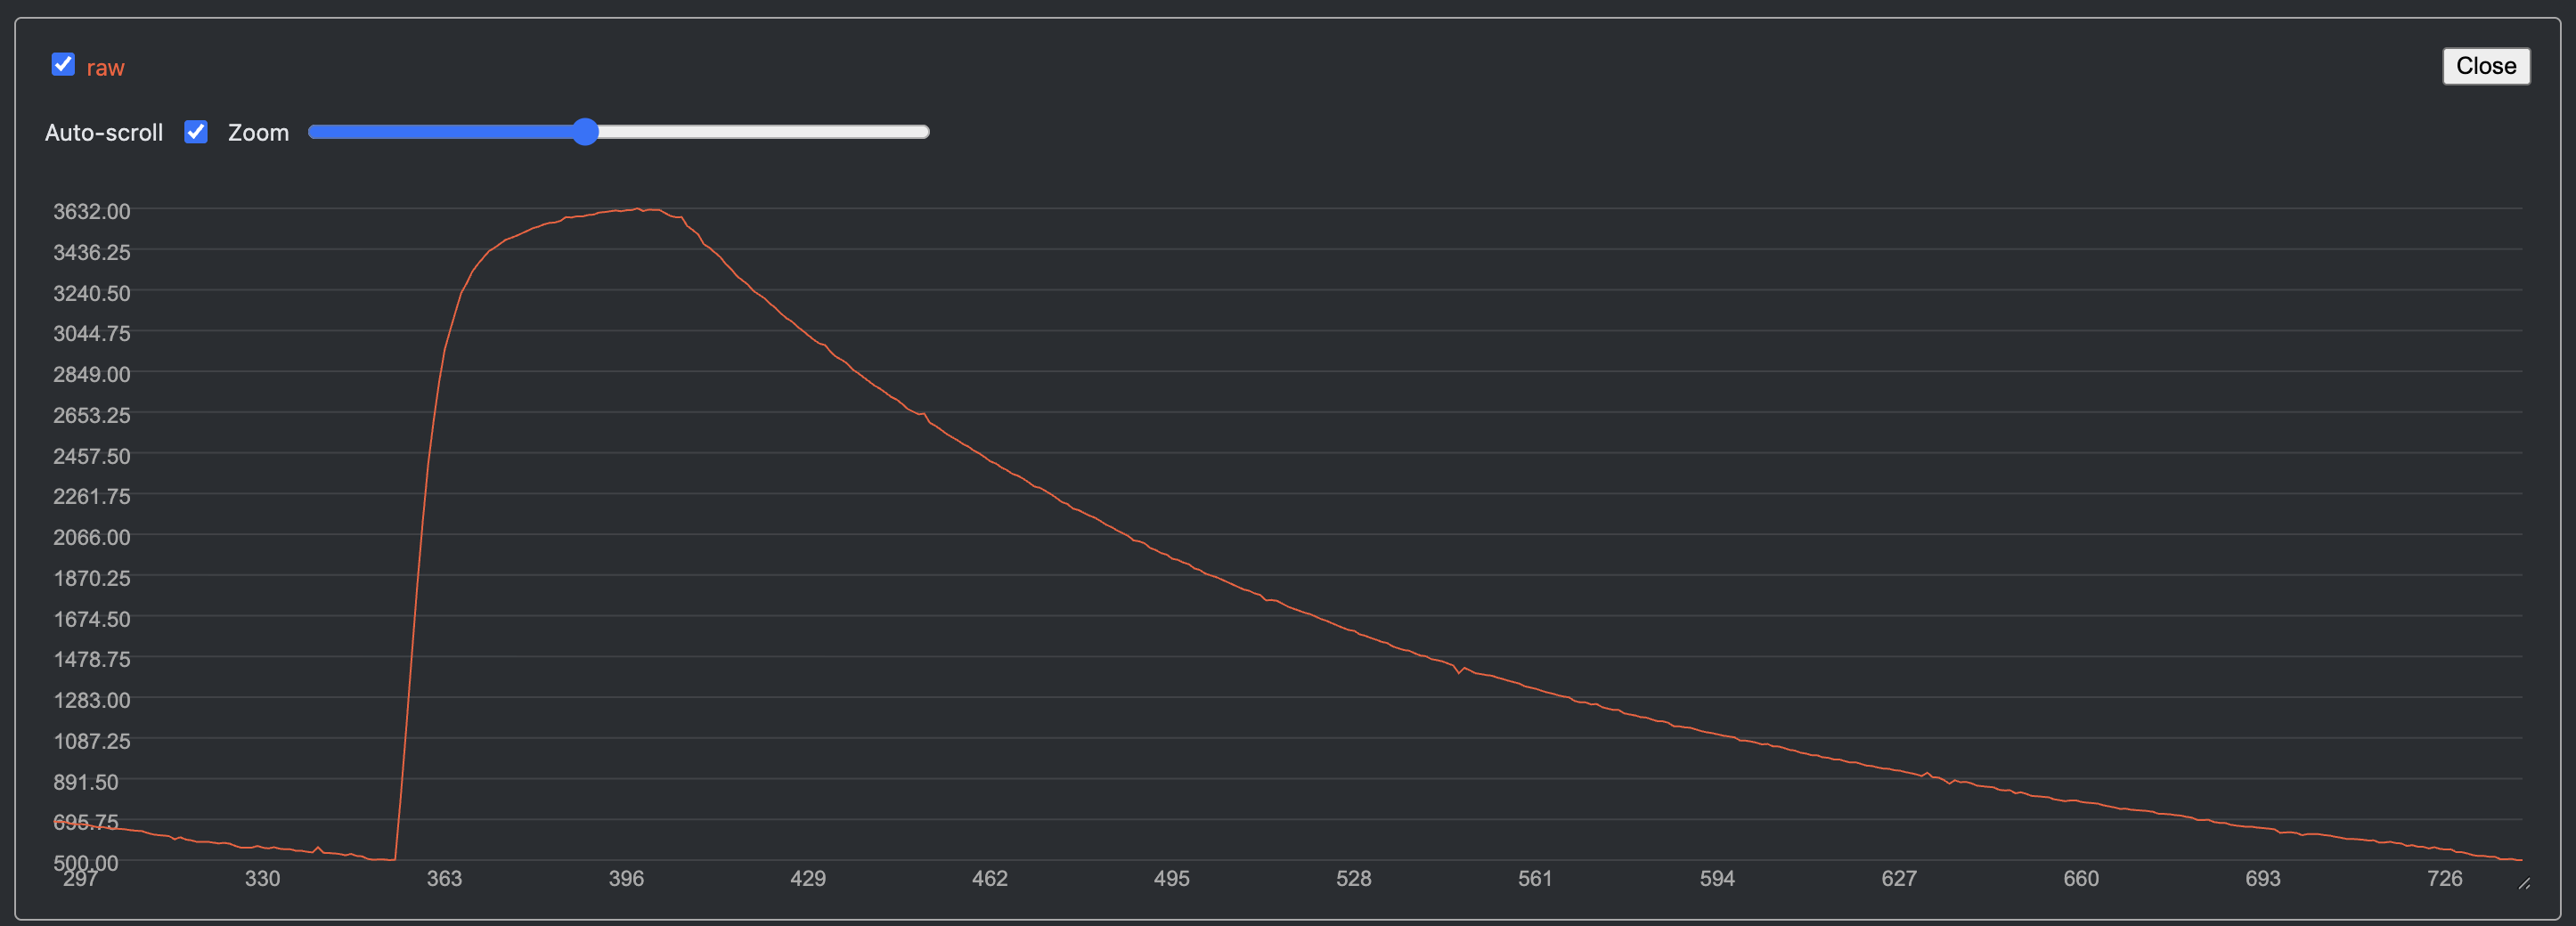
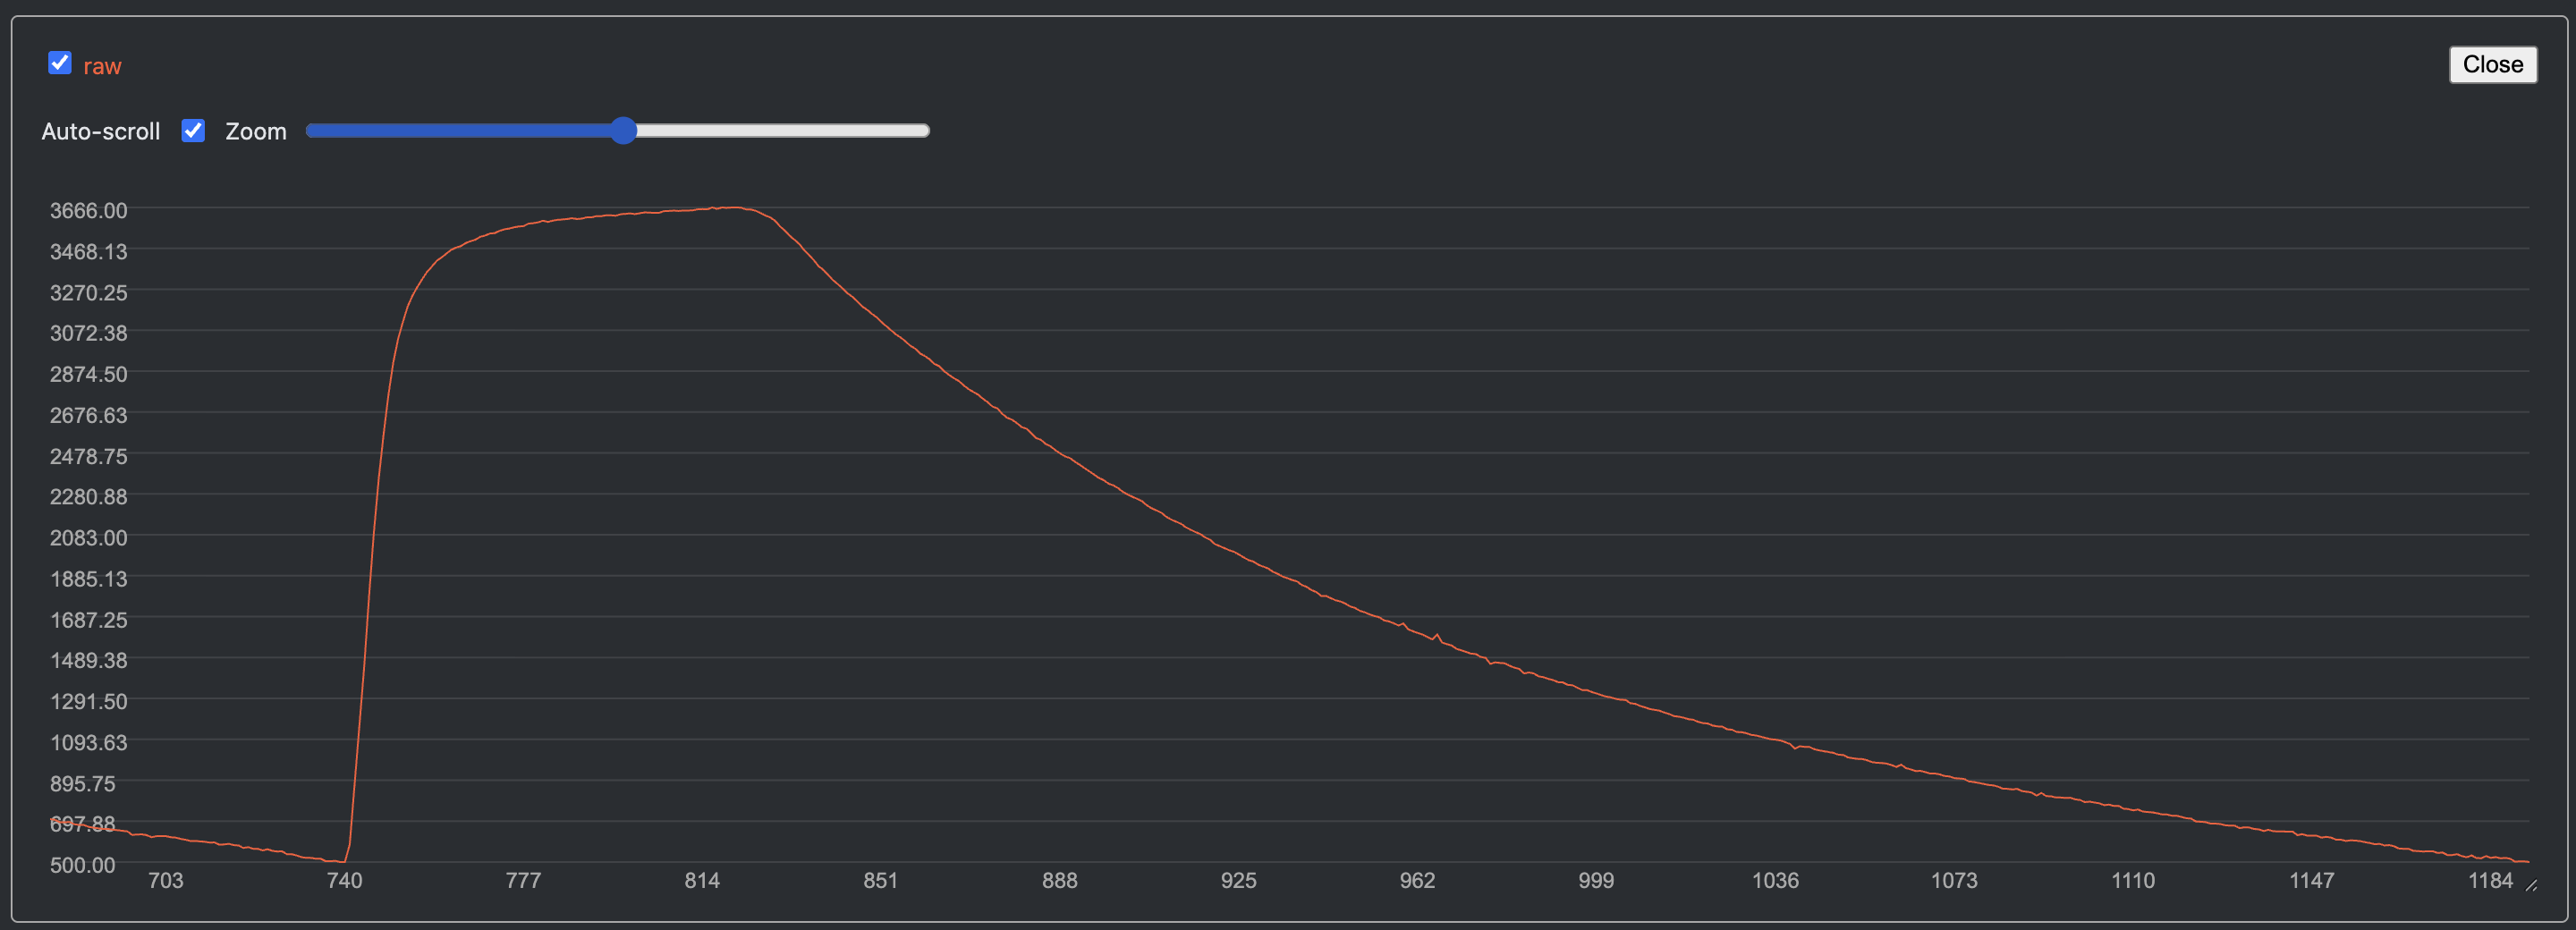
If you activate the DEBUG mode in the source code, the device will output raw sensor readings to the serial console.
This can help you fine-tune the detection threshold during calibration.
You can use the Vscode Serial Plotter extension to visualize the sensor readings in real-time.
Example with Canon EOS 3000 at 1/500s, 1/250s, 1/125s and 1/60s shutter speeds:
 |
 |
 |
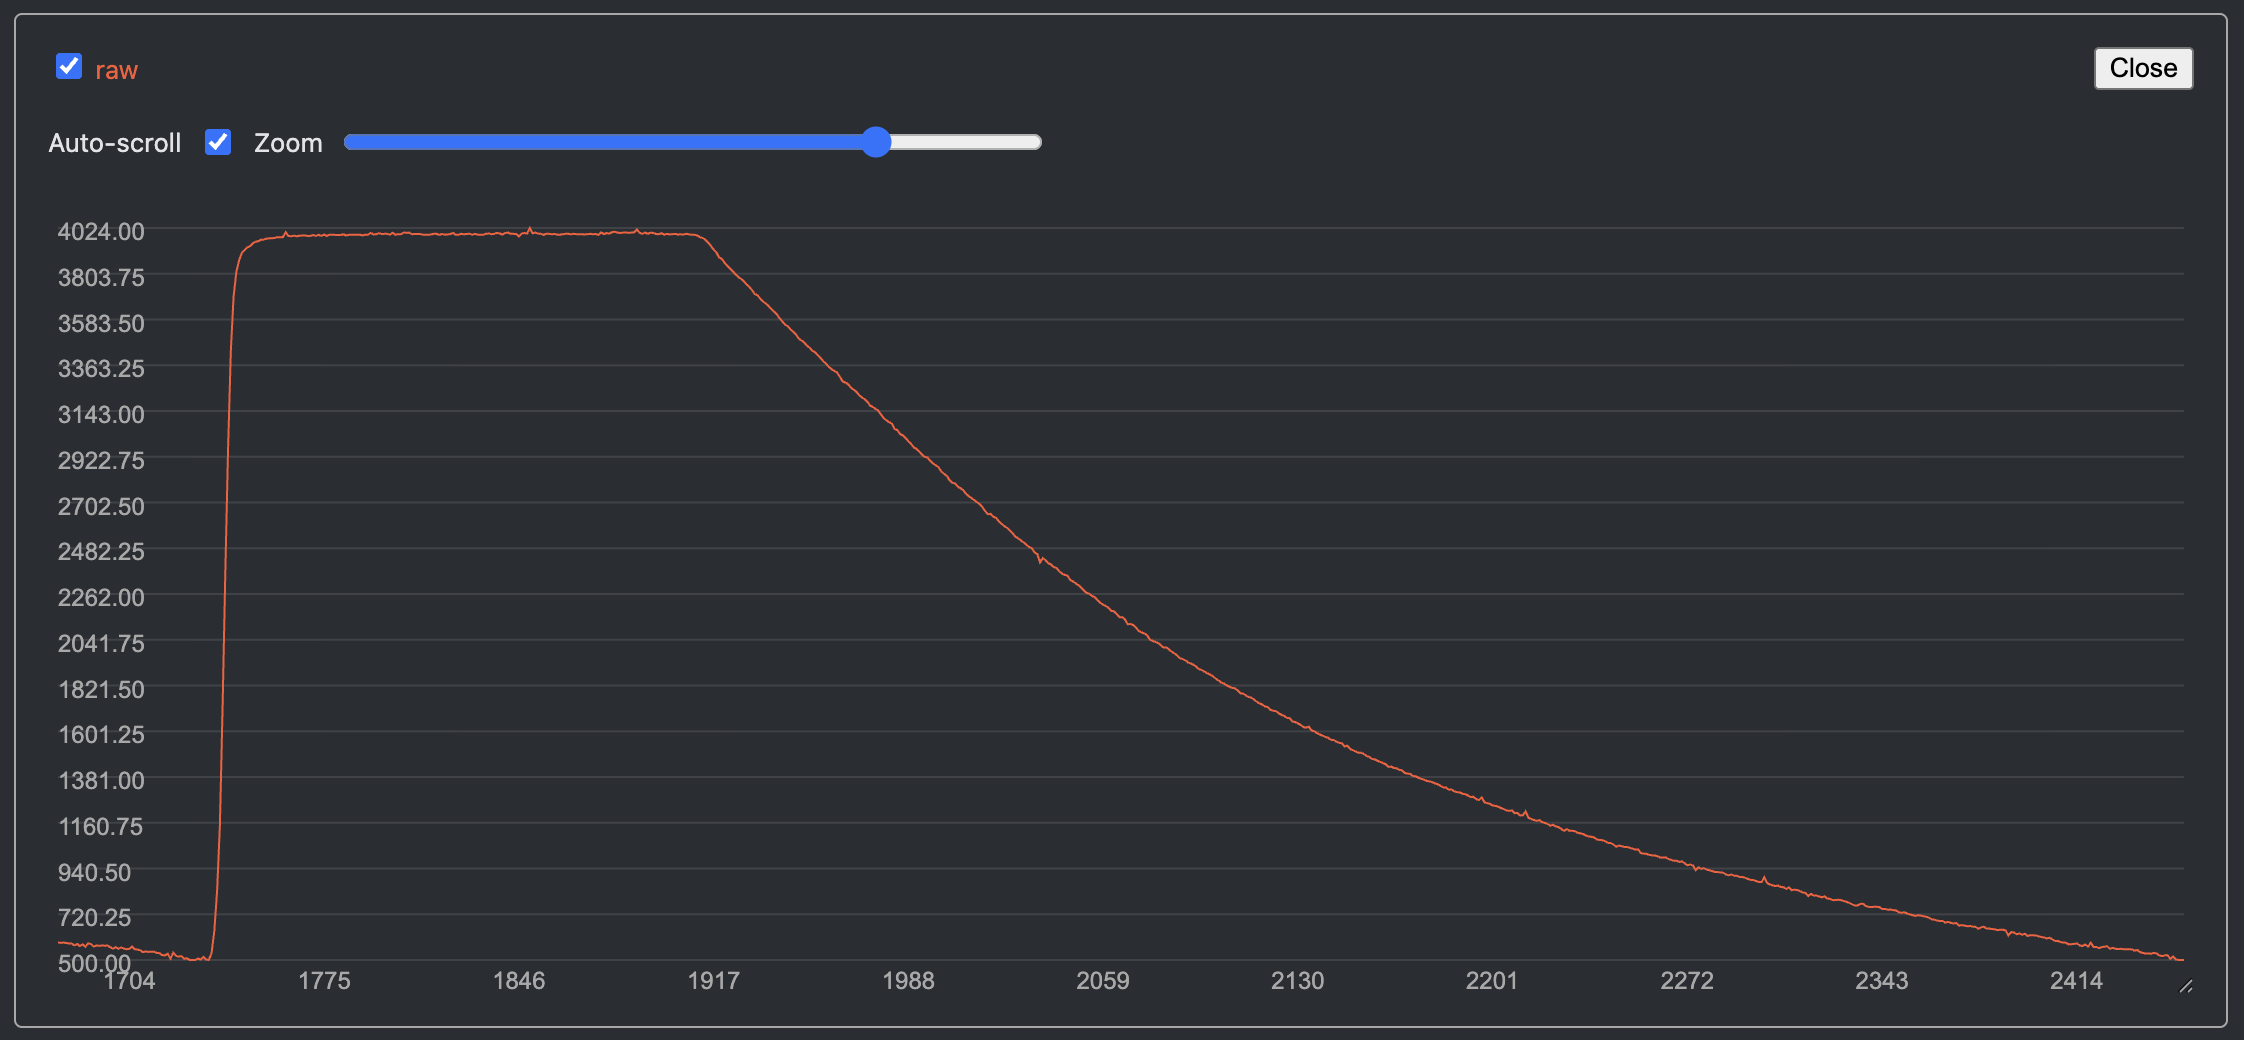 |
Example with Rollei 35S at 1/500s, 1/250s, 1/125s and 1/60s shutter speeds:
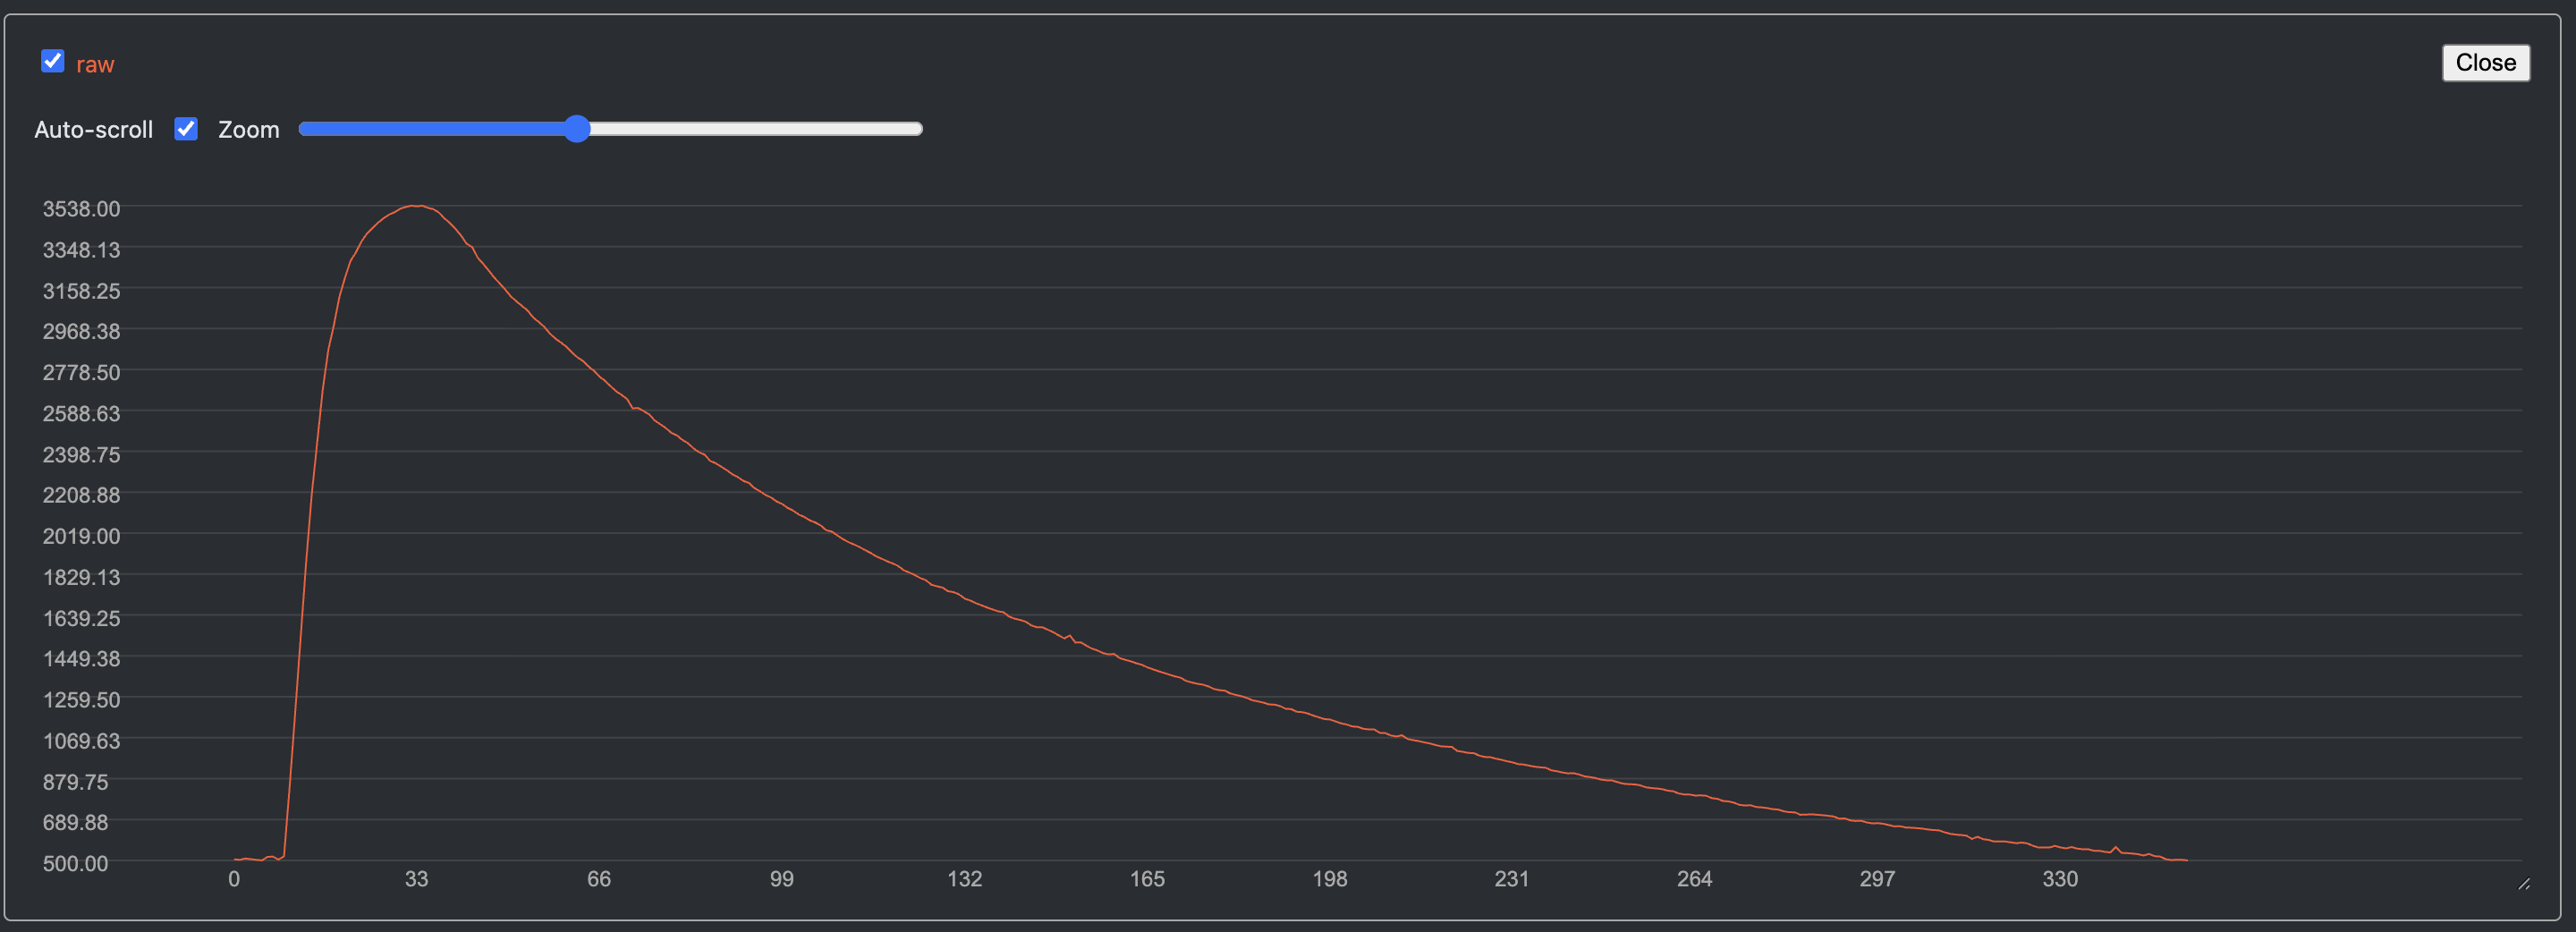 |
 |
 |
 |
License
This project is licensed under the GNU General Public License v3.0. See the LICENSE file for details.